Enjoy Making Your Own Sculptural Mood Lamp
You Only Need 4 Materials And No Special Tools To Make This Unique & Beautiful Lamp:

All you need is paper towels, aluminum foil, glue, and plaster you can get at any hardware store. All together costing less than $20.
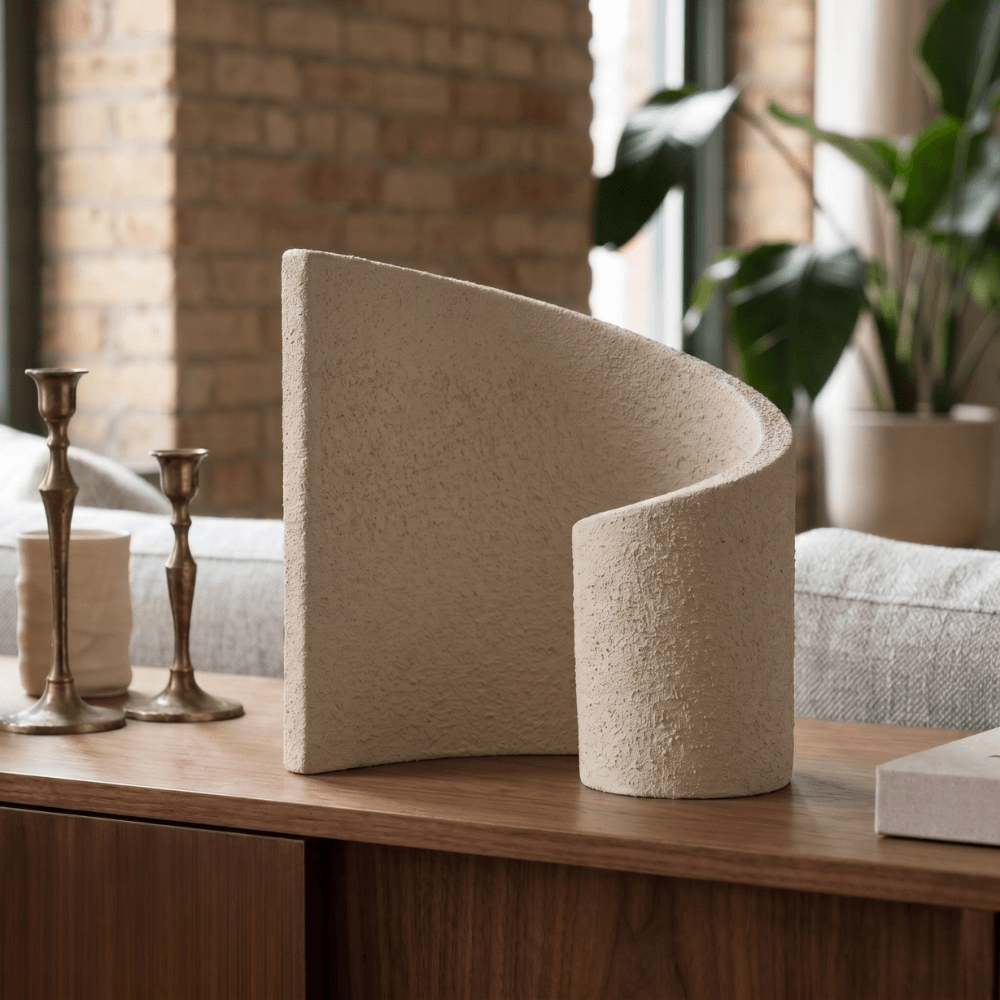
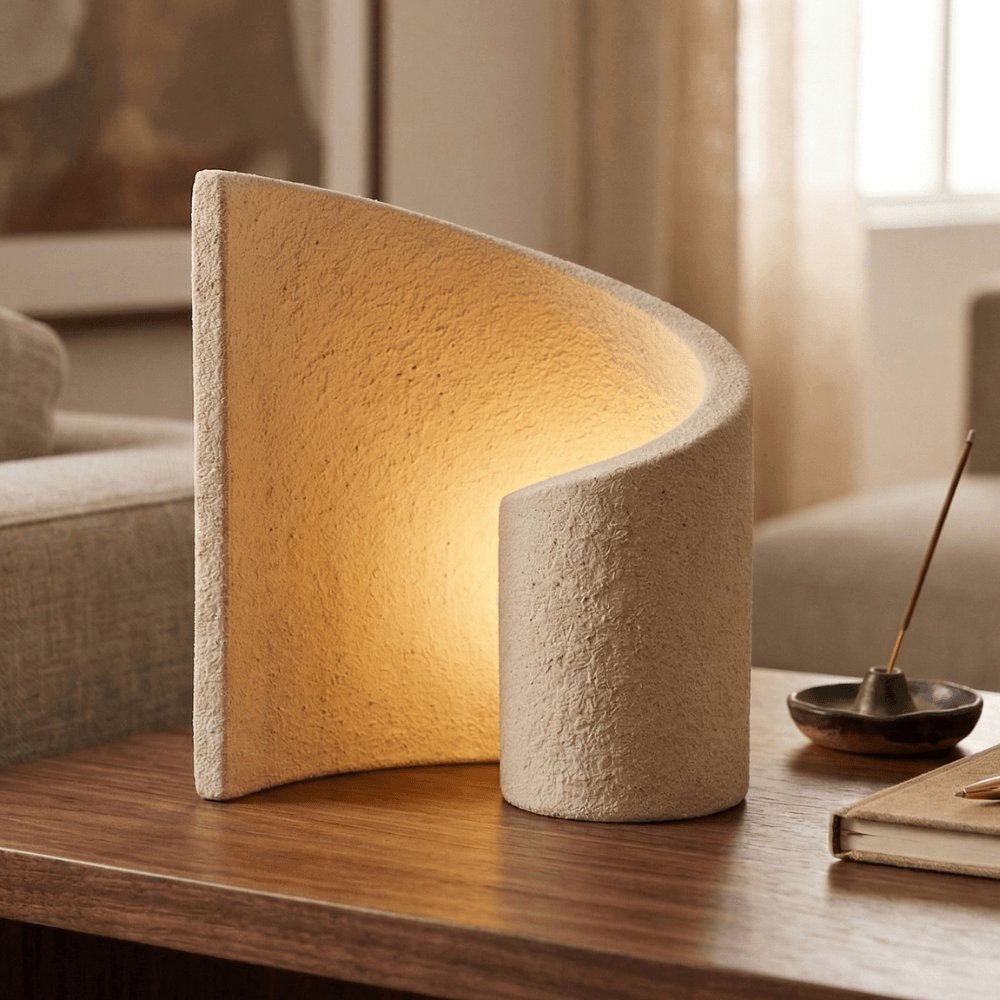
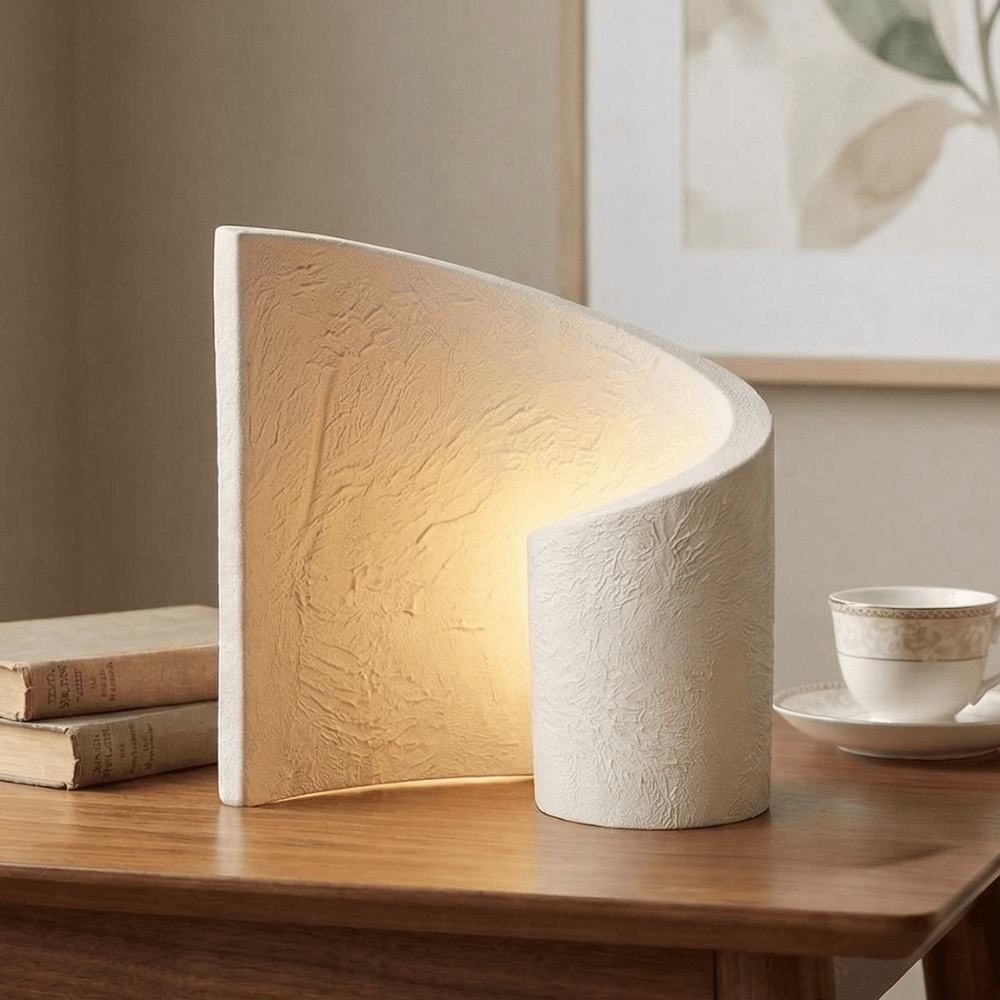
And with the help of the step-by-step video course, you'll turn those four simple materials into this beautiful and unique lamp for your home:
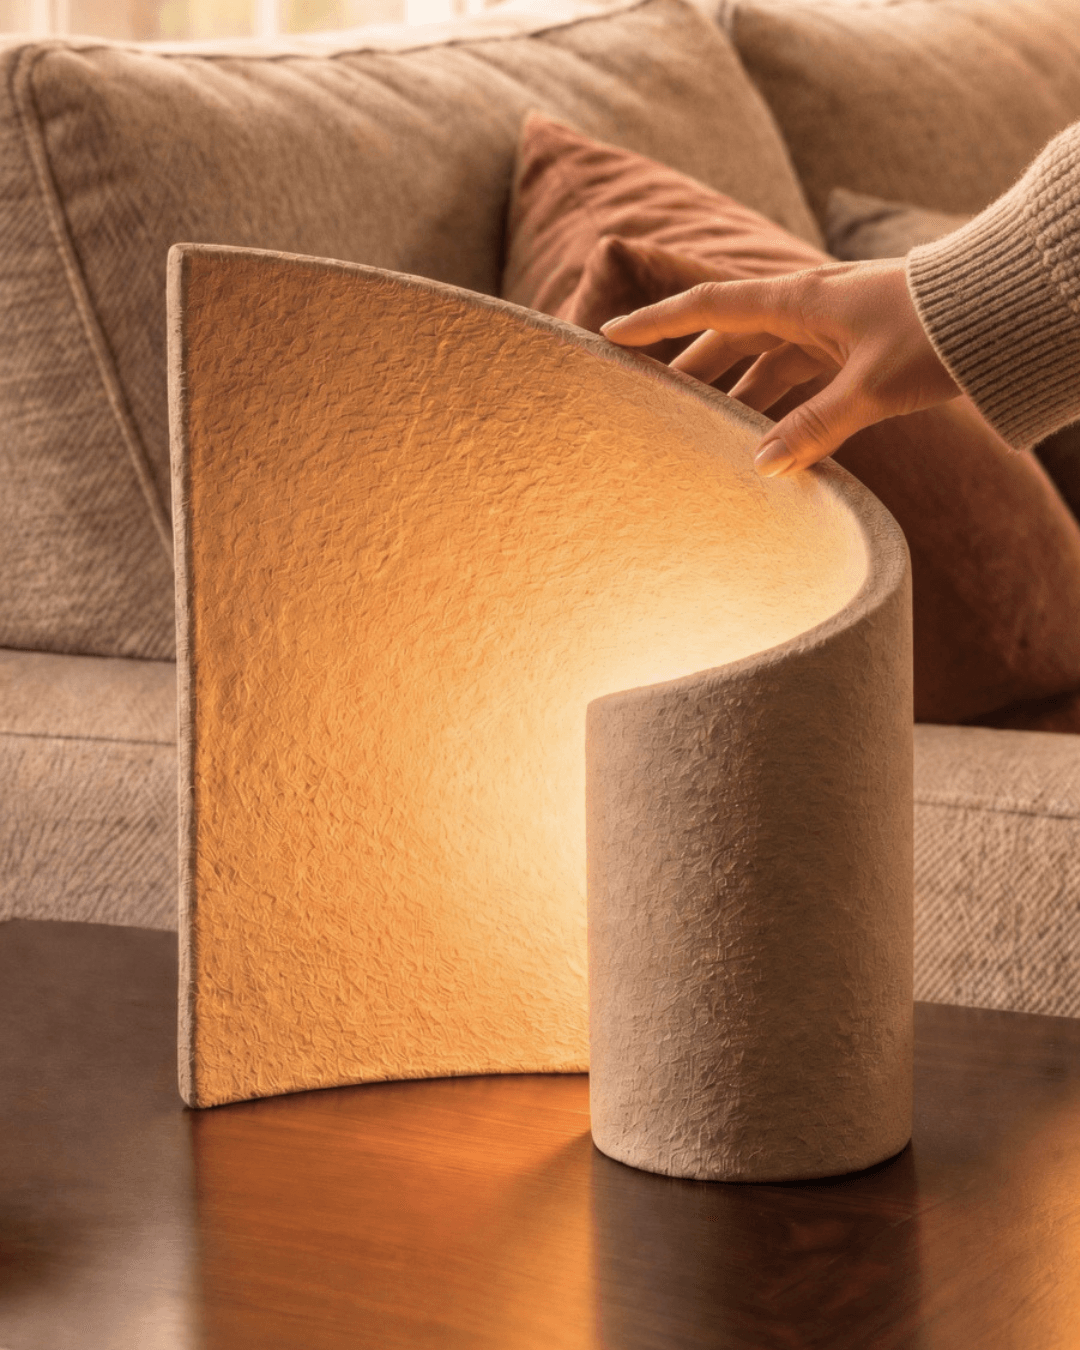
This Project Is All About A Fun, Meditative, & Creative Process That Gives You A Beautiful Reward At The End
Break up the "same old same old" of daily life with a fun, new, hands-on challenge to make something beautiful to adorn your home.
Lose yourself in a new experience of simple, physical creativity, making something entirely your own that you never would have imagined.
Feel that quiet thrill when family and friends assume you bought it somewhere expensive — and you get to tell them you made it, and smile while they gasp with unbelief.
Make a new memory and shake up the routine of life with some fresh excitement, all from the comfort of your own home, going at your own pace.
Do something just for you — not for the kids, the house, or anyone else who needs something. Just you, your hands, and a project that's yours alone.
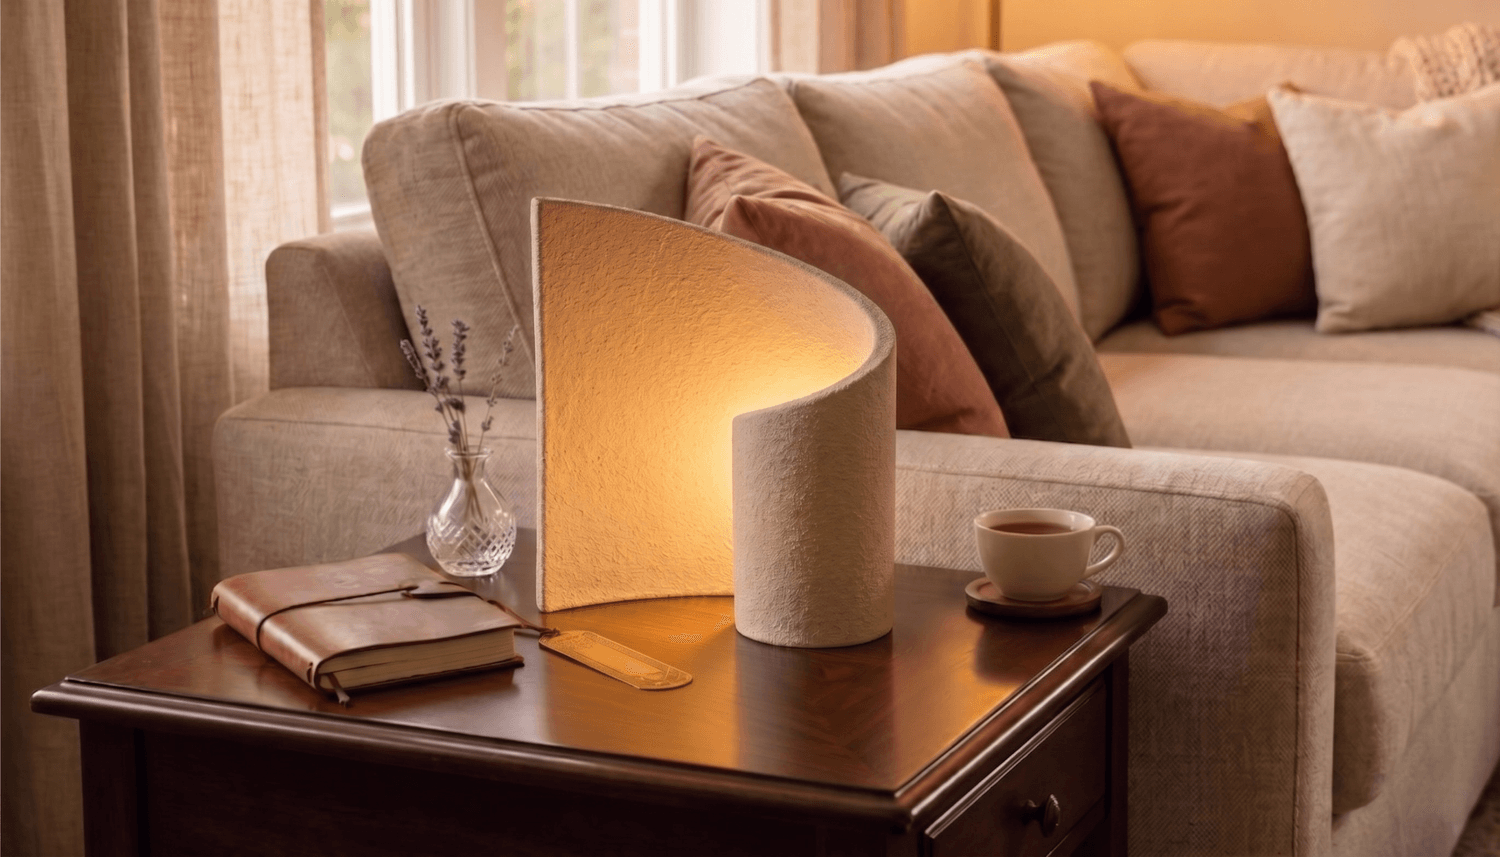
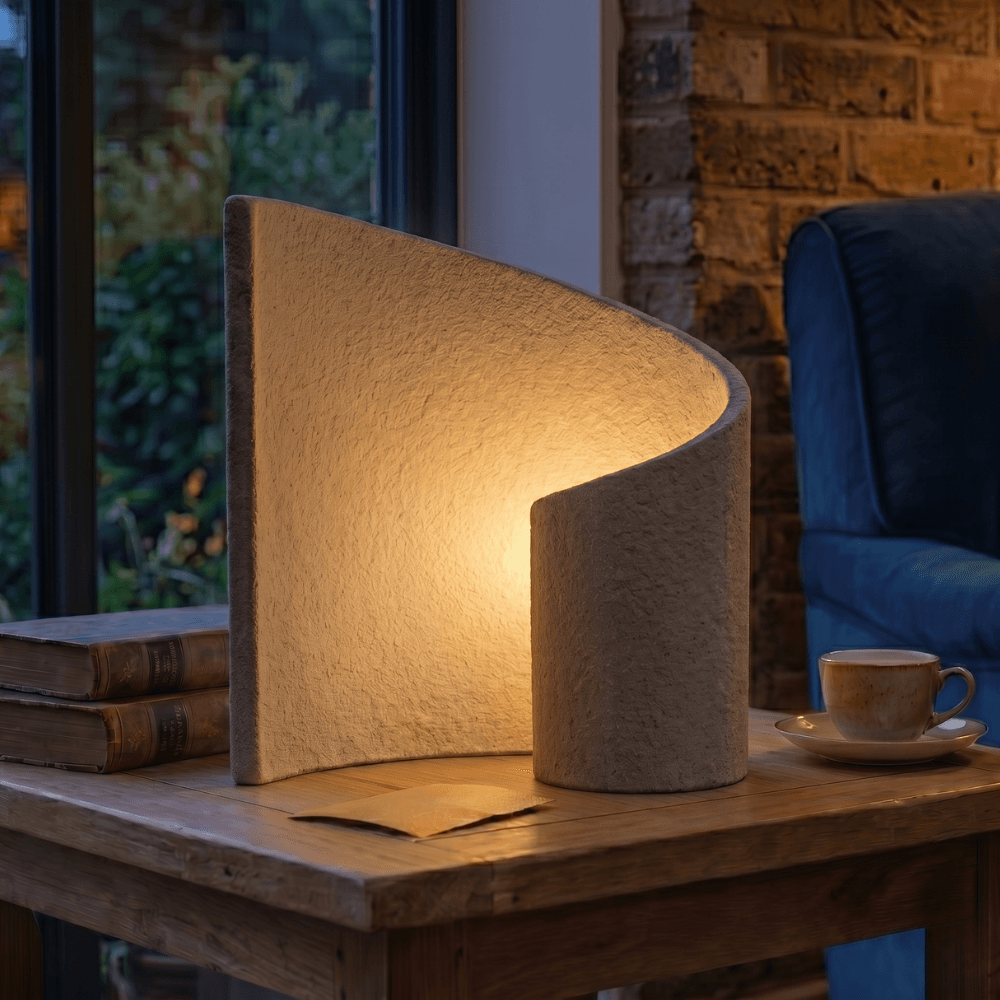
Turn on your lamp in the evening and relax in the glowing atmosphere of a one-of-a-kind lamp you made yourself.
Give a lamp as a meaningful and personal gift to all those people you know who already have everything.
"Yeah that looks amazing. But what's mine going to look like?"
Here's the truth: this lamp doesn't require talent. It requires a method.
That method is what this course teaches.
Every step is filmed, slowed down, and explained so you can follow along at your own pace. No skipping. No guessing. You'll see me build this lamp from start to finish in just a couple of hours of hand-on work.
If you can follow a recipe, you can do this.
So yes — your lamp will look like the pictures while still being unique to you.
But here's the thing most people don't realize until they're halfway through:
The lamp isn't actually the best part.
The best part is the afternoon spent making it. The quiet focus of layering paper towels over a curve you shaped with your own hands. The slow satisfaction of watching plain materials become something sculptural. The pleasure of a project that requires nothing of you except your attention.
Most people start this course wanting a beautiful lamp.
They finish it wanting another project.
The lamp is just the cherry on top of the fun of making it.
Meet Your Instructor
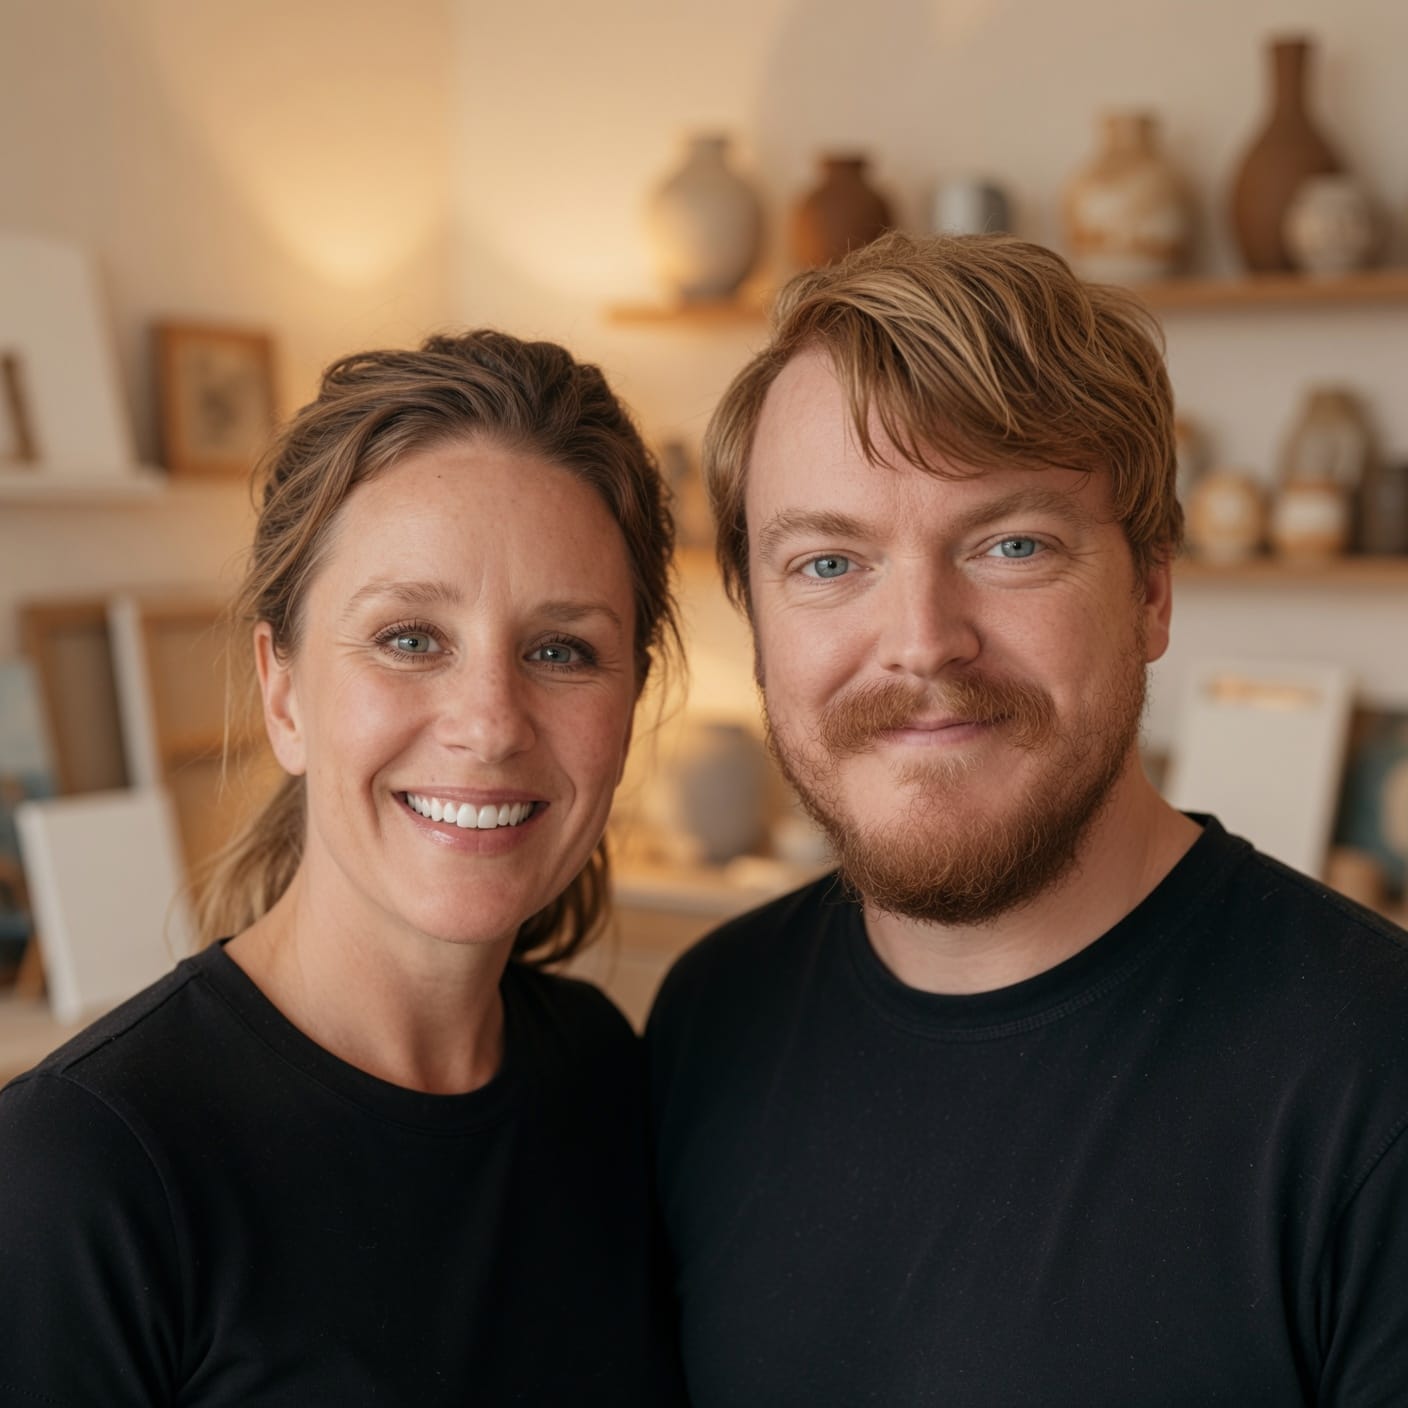
Hi, we're Thomas and Liz.
We're not a professional sculptors or a trained artists.
But we love filling our home with beautiful things we've made instead of mass produced things bought at a store.
When we came across a ceramic sculptural lamp selling for $300 we thought it was perfect. We love indirect light and the texture of natural materials.
But I didn't have a kiln or all the fancy equipment for ceramics.
Then Thomas realized we could make it with other, simpler methods we did know.
So we went for it and the project turned out beautifully as you can see, and our course gives you all the success with none of the frustration as you make this beautiful lamp.
You skip straight to the fun part: An enjoyable project that rewards you with a beautiful light to enhance the mood of your favorite nook or corner of your home.
Not from something you ordered, but from something you created.
Sharing how is why we created Made Home Studio...

For the first time ever Made Home Studio introduces…
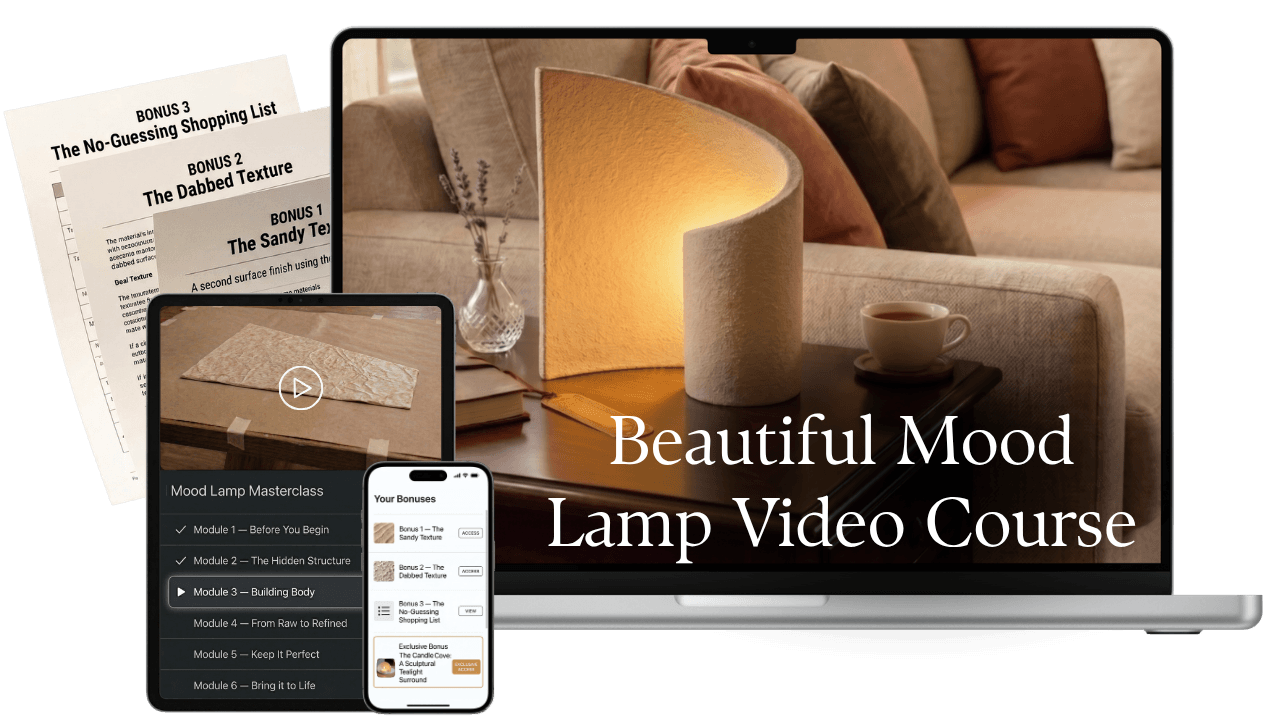
The Sculptural Mood Lamp Masterclass
You'll create your own beautiful, sculptural mood lamp at home.
What you thought was impossible becomes simple through this step-by-step video course.
Completely beginner-friendly. Fully self-paced. No experience required.
Here's How You'll Make This Beautiful Lamp:
Step 1:
Get Set Up & Ready To Go (no guessing, no overwhelm — just confidence)
Never made anything like this before? Perfect — this is where we start. By the end you'll have everything ready and a clear picture of exactly what you're about to build.
(Looking at the picture, you might wonder "Are we baking a cake?" And honestly, it's a lot like baking a cake and frosting it!)
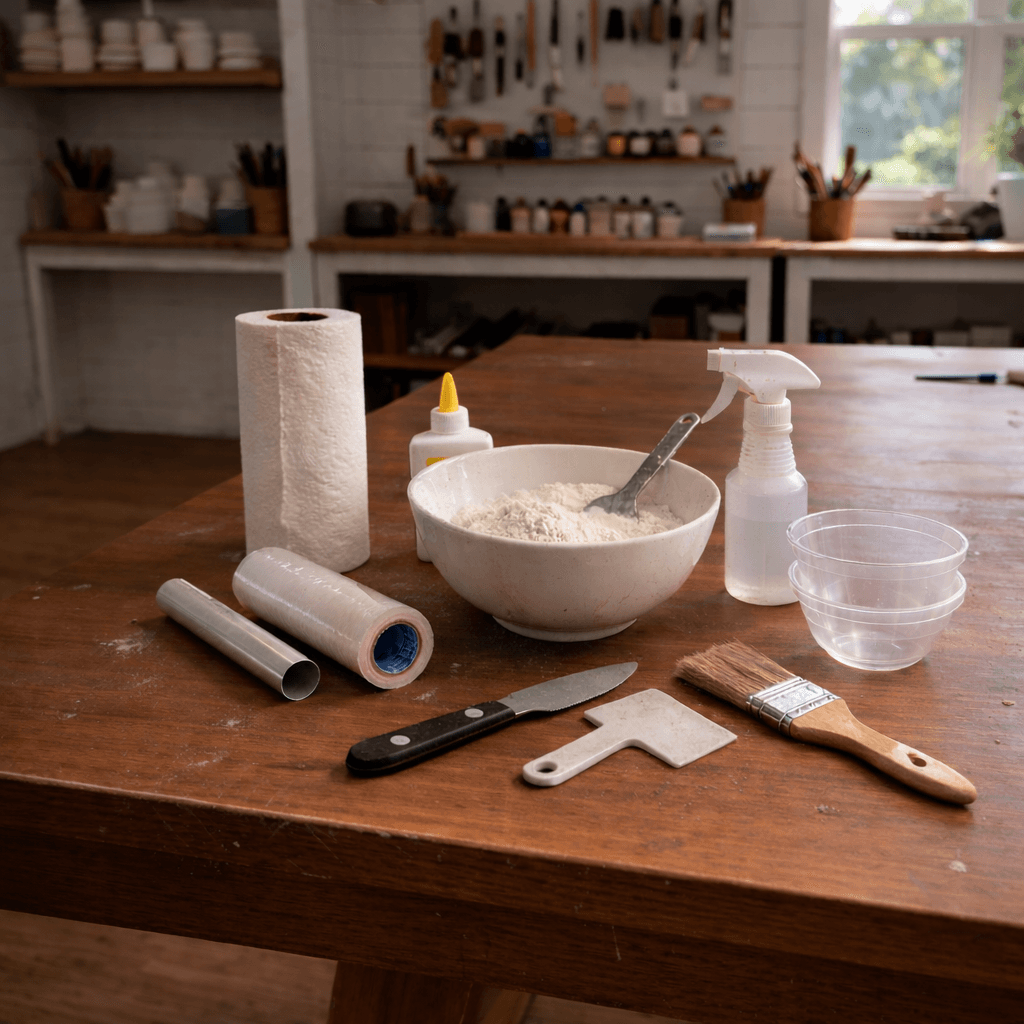
A walkthrough of the full build process from start to finish — so nothing surprises you and every step makes sense before you do it
The complete materials list: what to buy, where to get it, and what the whole project will cost (less than you think)
The workspace setup tips to make every stage easier — no studio required, just a table and a little space
Step 2:
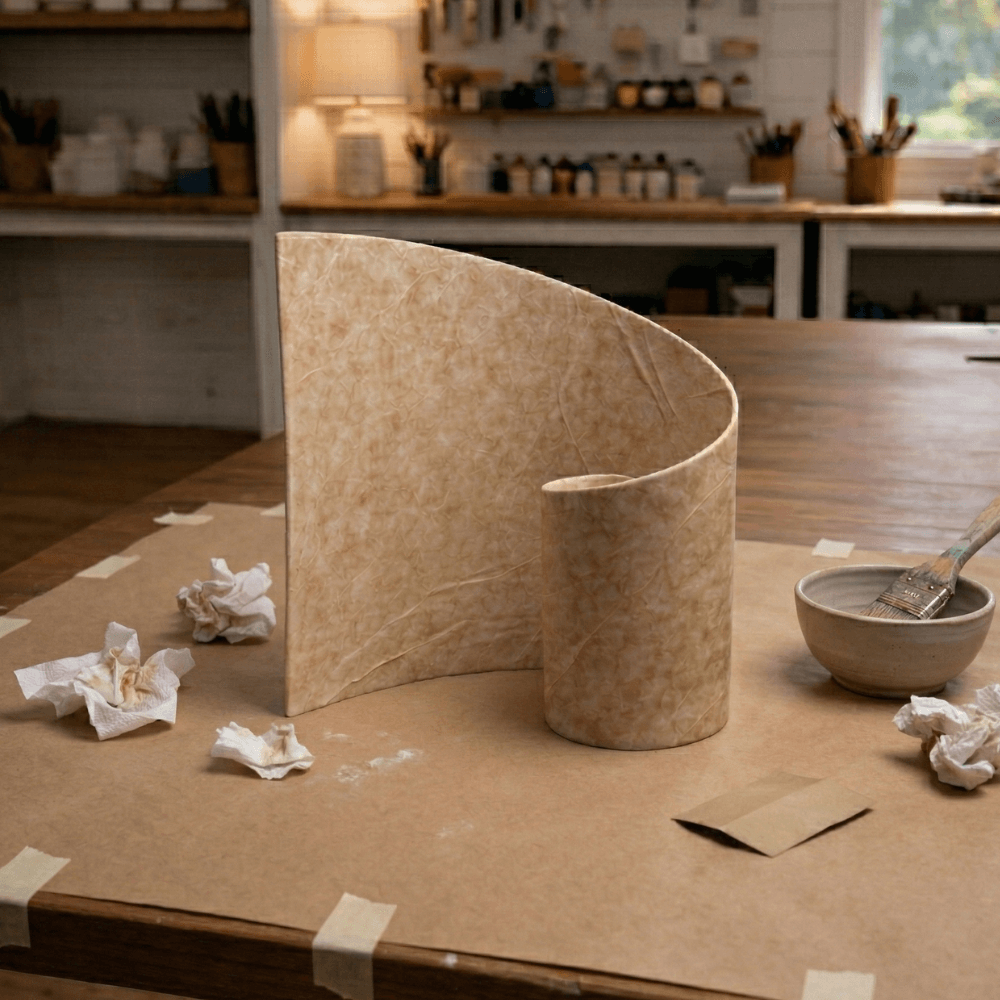
Form The Hidden Structure (a lightweight and easy-to-form foundation)
By the end of this step you'll have a solid, lightweight lamp form that holds its shape — built from common household items, using a method that works every time.
How to create the foil core that gives your lamp its form — flexible enough to shape by hand, rigid enough to hold once set
How many layers of paper towel to apply, and how to soak them so the glue bonds all the way through
The flat-to-upright technique: how to shape the lamp on a flat surface and flip it into its final curve without it collapsing
How to know when the structure is fully dry and ready for the next stage
Step 3:
Build Up The Body (thickness, strength, and no slumping)
By the end of this step your lamp has real substance — walls that feel solid, hold their shape, and are ready to texture.
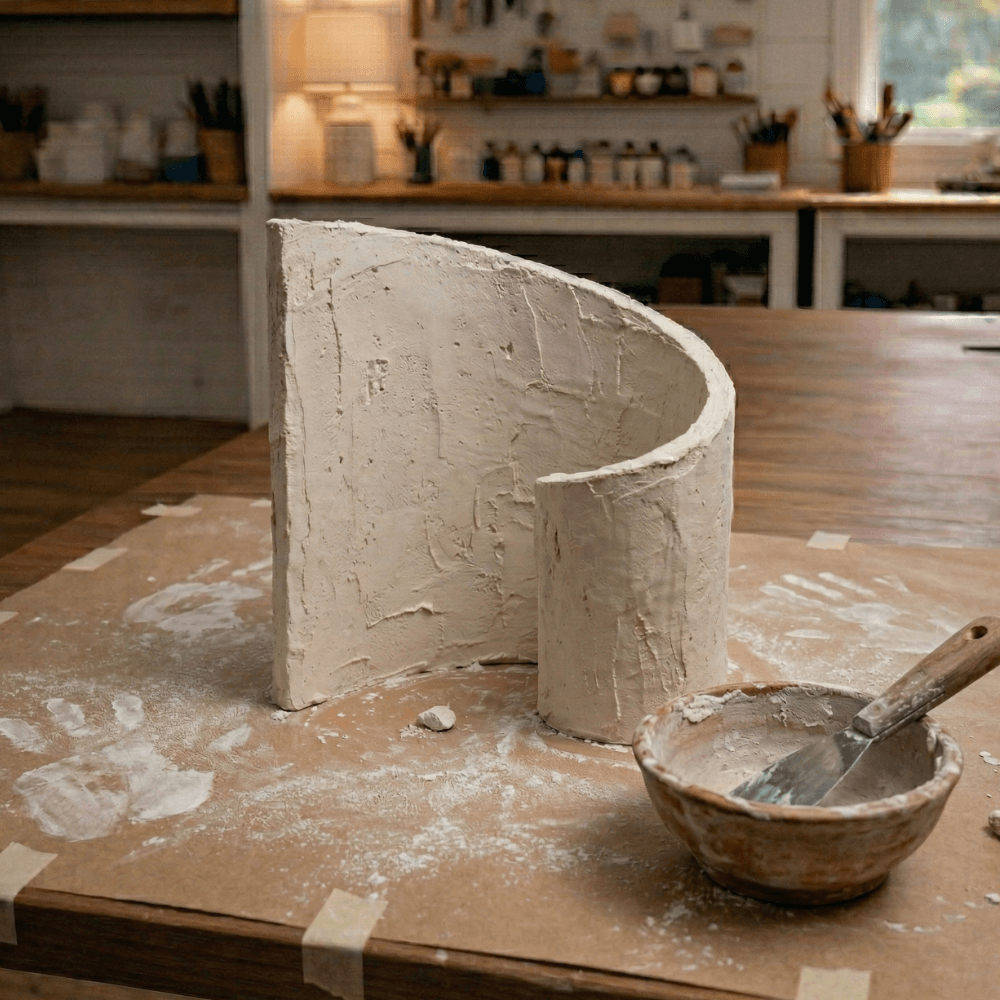
The recipe for creating the perfect paste consistency
How to apply the paste so it sticks to vertical surfaces for easy shaping
The build-up sequence that creates even wall thickness all the way around — no thin spots, no heavy patches
How to tell when you've built up enough layers — and a final step to increase strength
Step 4:
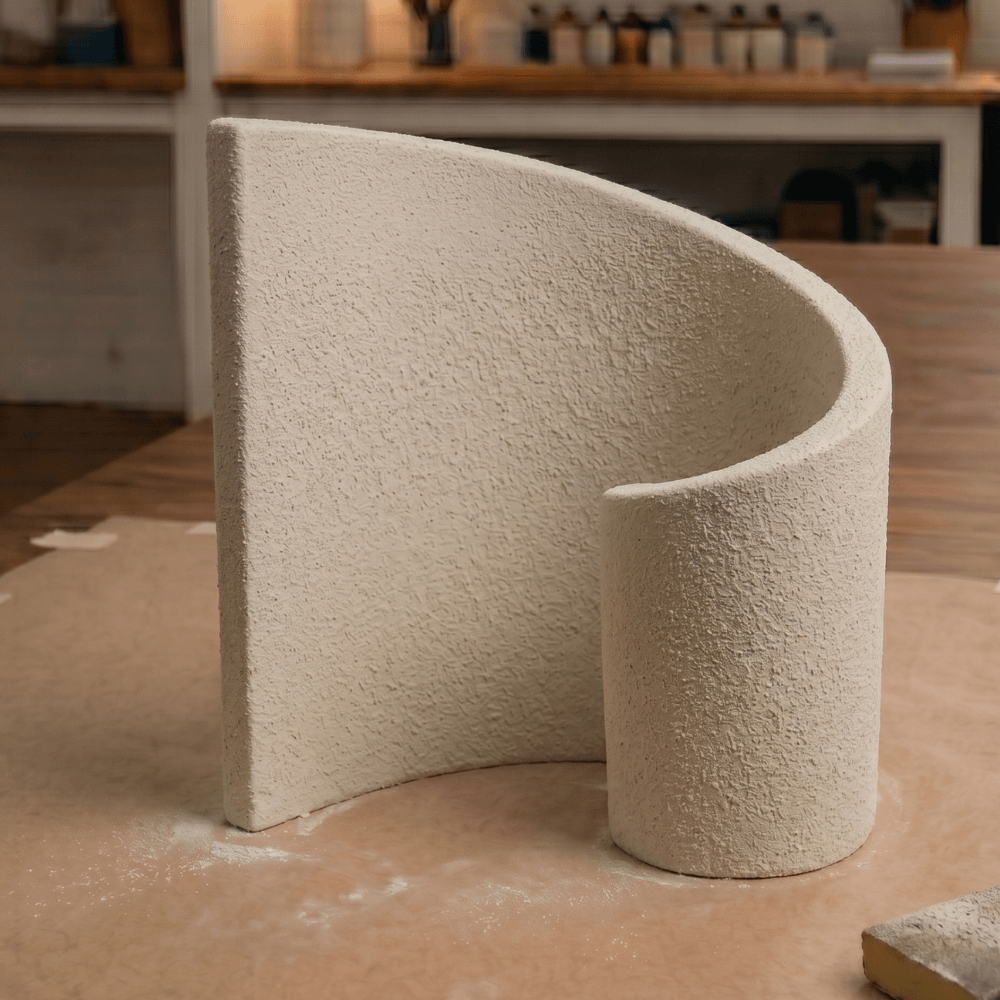
Refine The Surface (texture that looks intentional, not accidental)
By the end of this step your lamp has a finished surface that looks architectural — the kind of texture that makes people think it came off a ceramics wheel.
How to apply the initial texture pass so it looks deliberate and consistent, even with beginner hands
The finishing pass that unifies the surface and removes the rough edges that give away a first attempt
Three surface mistakes that instantly downgrade the result — and the specific fix for each one
The edge treatment that gives the lamp a clean, considered look people notice without knowing why
Step 5:
Keep It Perfect (how to seal and protect your lamp)
You've spent time making something beautiful. This guide makes sure it stays that way. The right sealing approach protects your lamp from dust, moisture, and everyday wear — without dulling the look you've created.
The one sealing product that protects without leaving a sheen that cheapens the finish
How to apply it so the surface stays matte, architectural, and gallery-quality
What to do if the surface gets marked or scuffed after sealing — the simple fix that restores it
How to clean your lamp safely so it keeps looking its best for years
Step 6:
Add Your Light (easily add the right lighting to your lamp)
By the end of this step your lamp is fully assembled, safely plugged in, and glowing exactly the way it should.
How to choose the right bulb so the light works with your lamp's form — warm, diffused, architectural
Why bulb position matters more than bulb brightness — and the exact placement that creates depth in the glow
The final assembly sequence so everything fits cleanly and the finished lamp looks complete
If you’re thinking, “This would be fun to make some other day…”
…that’s exactly why it’s worth getting access today.
It’s hard to predict when the creative mood will strike you — or when you’ll have the right free time to begin.
But when that moment does come, it feels so good to have everything ready to go: no errands, no waiting — just the joy of starting when inspiration strikes.
You can simply open the course and start the project.
So do your future self a favor and get set up today.
You probably have 2 of the 4 materials at home already: paper towels and aluminum foil.
That means you only need wood glue and plaster powder — both inexpensive and easy to find at most hardware stores.
So instead of leaving this as another “maybe someday” idea, you can get access today, check clear guidance provided in the course, and grab the 2 other materials when you're out and about over the next few days.
Then, you’ll have a beautiful hands-on project ready to go for your next rainy day, quiet weekend, or afternoon when you want something creative to do.
And since you get lifetime access to the video course, there’s no pressure to rush — the project will be waiting for you whenever you’re ready.
Get the course today, gather your few simple materials, and give yourself a creative project to look forward to.
A Special Invitation, For You
This course gives you the method to build your own beautiful lamp — and to make others if you want, in any size, any finish, and any variation. For other rooms, homes, or gifts for friends.
You can get everything we've covered, plus some wonderful bonuses (see below), for $27.
You'll have the course forever. Go through it at your own pace, on your own time.
ONE-TIME PURCHASE. LIFETIME ACCESS.
No recurring charges. Ever.
Normally $97
Now Only $27
One-time payment.
Lifetime access.

P.S. If the next page doesn't load… I'm sorry, but the deal has ended!
If you're still unsure...
You can try it completely risk-free:
You don't have to make the final decision now.
I want you to experience the joy of your creativity without any worries.
My job is to ensure your success — you either love what you made, or you don't pay.
You can join the course right now and get full access to every single lesson. Take a full 30 days to try and explore the course risk-free:
Watch the lessons.
Follow the steps.
Create your lamp.
If you don't feel proud placing your lamp in your home, reach out within 30 days and you'll get a full refund.
Just reply to your course access email, and you'll get 100% of your money back within 24 hours.
NO QUESTIONS ASKED.
NO HASSLE.
NO RISK.
This course was made to bring a creative and satisfying project into your life.
And you've got 30 full days to experience it for yourself.
And there's more… my extra gifts for you!
Get 3 Bonuses When You Start Today
Bonus 1:
Sandy Surface Texture Guide ($17 Value)
The lamp you see in the course has one signature texture — but you might prefer a different one.
This bonus shows you how to create a sandy surface finish — finer, more uniform, and with a warm natural feel that works beautifully in earthy or minimal interiors. Same materials, different technique.
The exact mix that creates a consistent sandy grain without looking gritty or rough
How to apply it evenly across curved surfaces so the texture looks intentional all the way around
The drying approach that locks in the texture without flattening it
How to finish and seal a sandy surface so it stays looking clean and refined
Bonus 2:
Dabbed Surface Texture Guide ($17 Value)
A second alternative finish — more organic and expressive. The dabbed technique creates an irregular, hand-worked surface that looks like it took years of practice.
The tool and motion that creates a consistent dab pattern without looking messy
How to control the depth of the texture so it reads as deliberate, not accidental
The areas where dabbing works best — and where to keep it smooth for contrast
How to finish and seal a dabbed surface so the texture stays sharp and defined
Bonus 3:
The No-Guessing Shopping List ($7 Value)
Every material used in the course, pre-searched and ready to order. No scrolling through dozens of similar products wondering which one is right — just a clean list of exactly what to buy, with direct links for many countries.
Every material from the course, linked directly to the right product on Amazon
Notes on what to look for if a product is out of stock — so you always get the right thing
Quantities to buy for a single lamp so you don't over-order
The one or two upgrades worth spending a little more on — and where they actually make a difference
FAQ
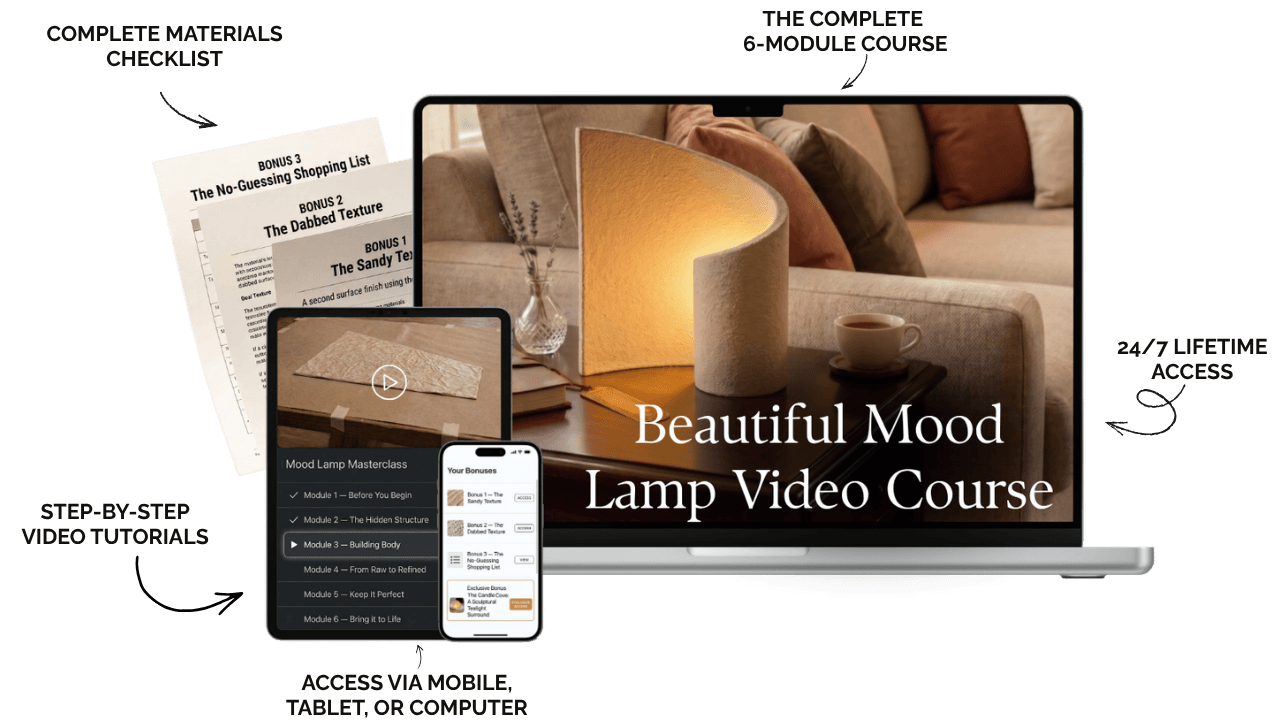
Begin today and you get:
Sculptural Mood Lamp Masterclass
6 step-by-step video modules — from raw materials to finished lamp
$97
Lifetime access + all future updates
Come back whenever you like. New additions included at no extra cost.
Included
100% risk-free money-back guarantee
30 days. No questions. No hoops.
Included
Bonus #1: The Sandy Texture
Step-by-step technique for a fine, natural-looking sandy finish
$17
Bonus #2: The Dabbed Texture
Step-by-step technique for a rich, textured dabbed finish
$17
Bonus #3: The No-Guess Shopping List
Exactly what to buy, where to find it, and what to skip
$7
Total Value
$148
Normally $148
Now Only $27
One-time payment.
Lifetime access.
P.S. If the next page doesn't load… I'm sorry, but the deal has ended!
© 2026 Frontier Enterprises, LLC
NOT FACEBOOK: This site is not a part of the Facebook website or Facebook Inc. Additionally, This site is NOT endorsed by Facebook in any way. FACEBOOK is a trademark of FACEBOOK, Inc.
All rights reserved